Creating Custom Views for the ARPEDIO Sales Heat Map
The ARPEDIO Sales Heat Map is a fully customizable report that gives you a strategic overview of account health and pipeline across all the objects you work with in Salesforce.
What You Can Report On
The Heat Map supports reporting on both the Account and Opportunity objects, as well as any other standard or custom objects where ARPEDIO Assessments are in use. You can create multiple Views and apply custom templates per object type to match the way your team works.
Creating a New View
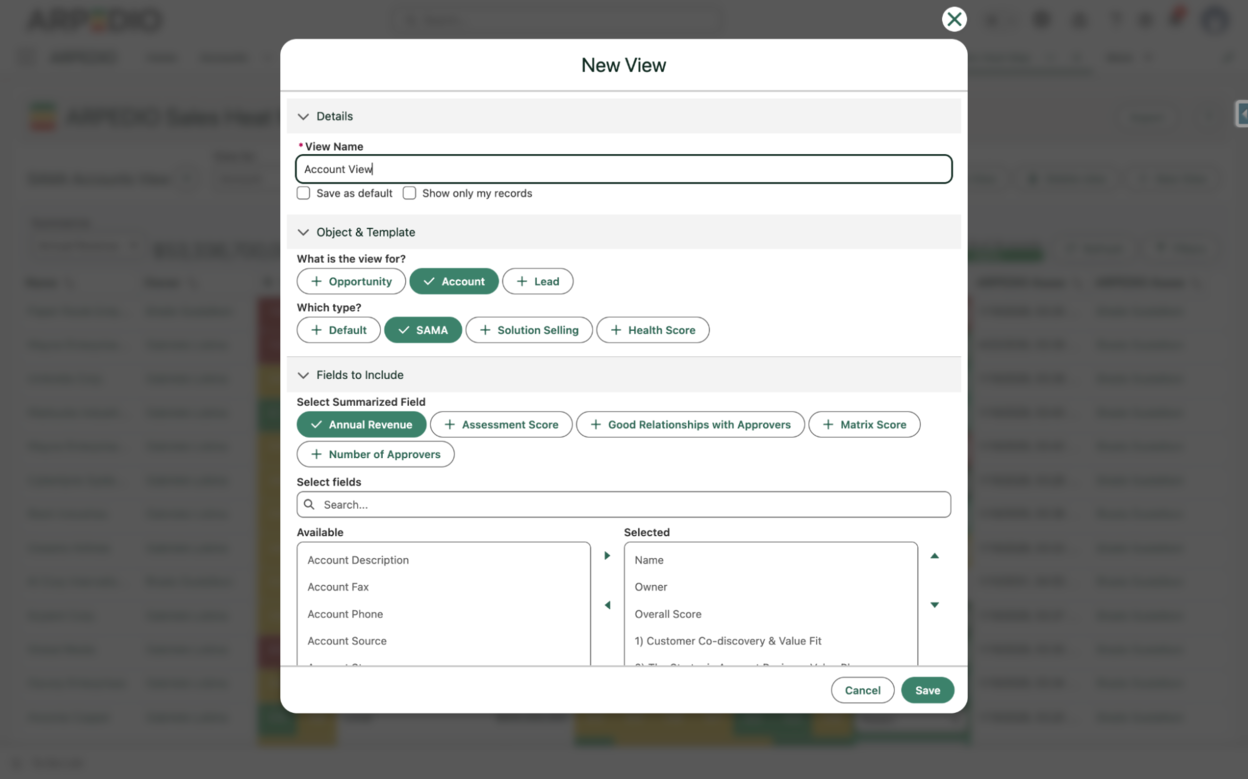
A View lets you define and save a specific configuration of the Heat Map (including which object, template, and fields to display) so you can switch between strategic overviews quickly.
To create a View:
- Click New View.
- Enter a name for the View.
- Select whether to set this View as your default. When enabled, this View opens automatically each time you open the Sales Heat Map.
- Select whether to show only your own records. If the View is shared with other users, each user will see records specific to them.
- Select the Object you want to report on.
- Select the Subtemplate.
- Select the Summary Field you want to display.
- Add the fields you want to appear in the Heat Map using the horizontal arrows, and adjust their order using the vertical arrows.
- From the fields you have added, select which field should sort the Heat Map by default, and choose the sort order.
- Click Save.
Editing, Cloning, and Filtering Your Views
If you created a View, you have access to the following options:
- Edit View — adjust the View configuration.
- Clone View — create a personal duplicate of the View.
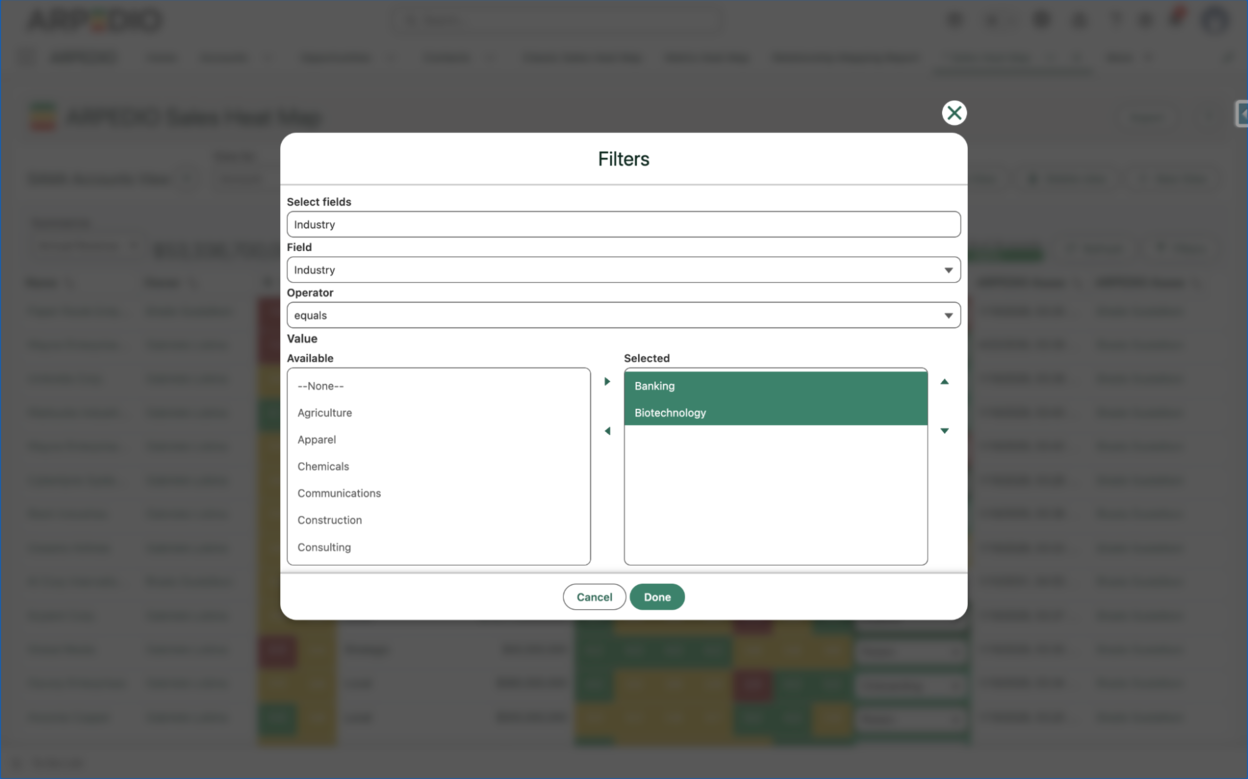
- Add Filters — refine the data displayed in the View.
Note: To edit or filter a View that has been shared with you by another user, you must first clone it. The cloned copy will appear under My Views and can be edited freely.
To add or manage filters on a personal View:
- Click Filters to open the filter panel.
- Configure your filter conditions.
- Enable Display Not Assessed Records if you want to include records with no ARPEDIO assessment data.
- Click Save to apply the filter as a default on this View, so it is active each time the View is opened.
- Click Refresh to apply the filters to the current session.
Sharing a View
- Click Share to open the sharing panel. Current permissions are displayed here.
- Click Add New Permission.
- Select the users you want to share the View with.
- Click Save.
- Click Finish to close the window.
Deleting a View
Click the Delete button to remove a View.
Important: You can only edit or delete Views you have created yourself. Views shared with you by another user cannot be edited or deleted. If you want a shared View removed from your Shared With Me list, contact your internal Salesforce administrator.