ARPEDIO Action Manager User Guide
The ARPEDIO Action Manager allows users to manage all actions related to a specific Account, Opportunity, or individual ARPEDIO assessment in a single place. It provides a clear overview of what needs to be done to progress a record or improve an assessment score.
The Action Manager can be placed on any record page, or on a Home page to display every action across all accounts and opportunities in one consolidated view.
How the Action Manager Works
The Action Manager is made up of three parts: Suggested Actions, Actions, and Views.
Suggested Actions
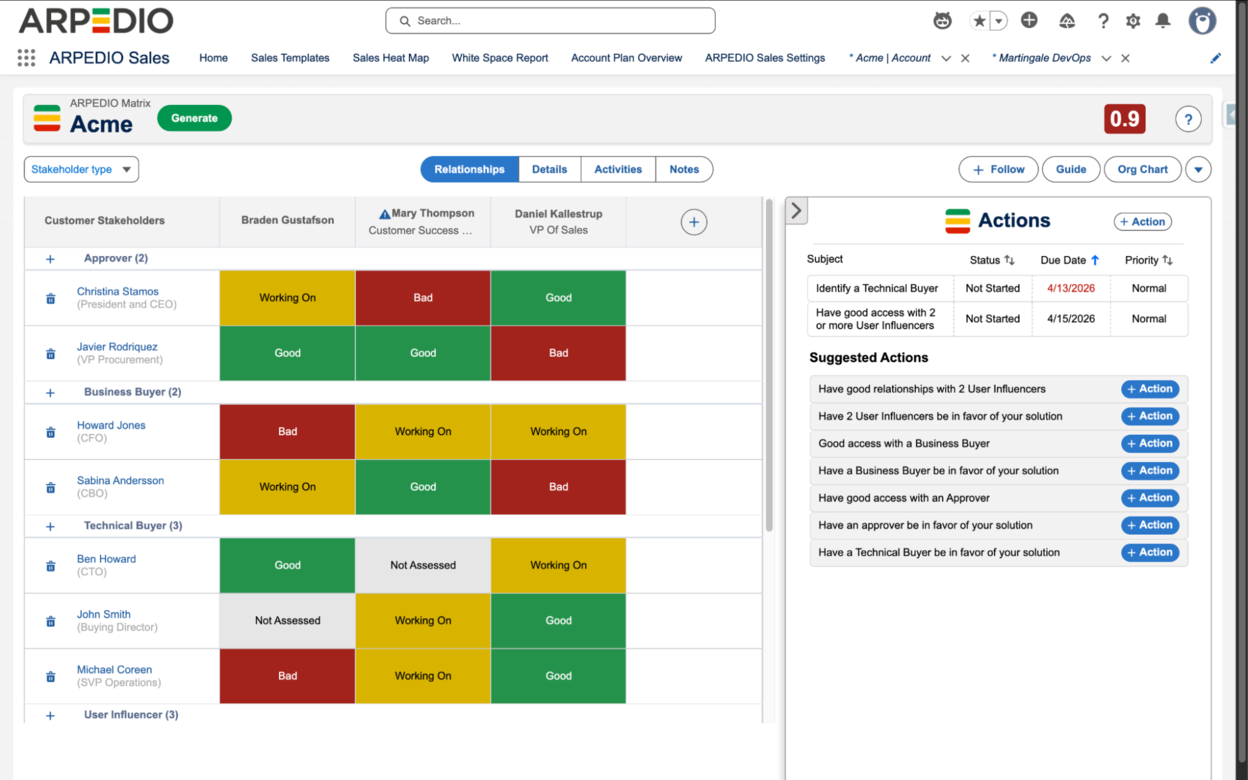
Suggested Actions are temporary prompts generated automatically based on the rules configured in your assessment template. They represent recommended next steps based on how the assessment has been answered.
- Suggested Actions appear when the conditions of a configured rule are not yet satisfied.
- As you complete the assessment and satisfy a rule's condition, the corresponding Suggested Action disappears automatically.
- Any unsatisfied conditions remain visible until resolved.
To convert a Suggested Action into a tracked action:
- Click the green button on the Suggested Action and select Add Action.
- A Salesforce Task creation window will open, with the Suggested Action title pre-populated in the Subject field.
- Fill in the relevant task fields and click Save.
Once converted, the Suggested Action is removed from the Suggested Actions section and the new task appears in the Actions section.
Actions
The Actions section displays Salesforce Task records linked to the current record or assessment. This provides a full overview of all outstanding actions required to progress the account, opportunity, or assessment score.
- Use the arrows next to field titles to sort actions.
- Select an action using the checkbox on the left to close or delete it.
- Closing an action prompts you to set the task status to Completed.
- Deleting an action removes the Salesforce Task record entirely after confirmation.
- Click the subject field of any action to open the full Salesforce Task record.
- New actions can be created manually at any time using the Action button in the top right corner.
Note: Any action with a due date before today's date will appear in red to indicate it is overdue.
Note: When an action is created within a Sales or Matrix Assessment, ARPEDIO adds a hidden reference linking that action to the specific assessment component it was created from. This ensures only actions from that component are displayed within it. Actions from individual assessments can also be pulled into a parent record Action Manager using Views.
Views
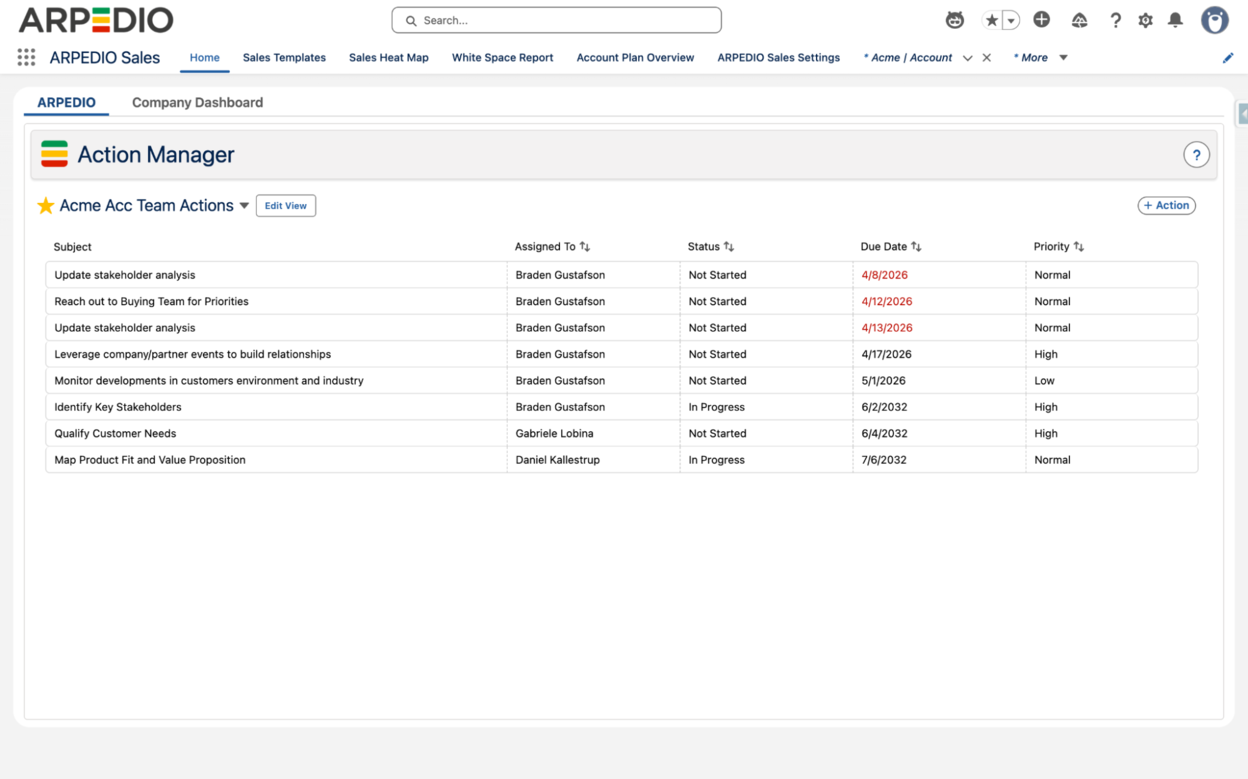
Views control which actions are displayed in the Action Manager and how they are organized. They allow users to tailor the Action Manager to show exactly the data they need.
There are two types of views:
- Custom Views are user-created and are the default approach. They are automatically applied when the Action Manager is placed on a page and are available in all environments.
- Preset Views are available in certain environments and take precedence over Custom Views when enabled.
To create a new view:
- Click the New View button.
- Enter a name for the view.
- Select which fields to display by using the horizontal arrows to move available fields into the Selected box. Use the vertical arrows to reorder the selected fields, then click Save.
- Choose which field the view should sort by default, and set the sort order to either Ascending or Descending.
- To apply filters, click the Filter button, then select the field, operator, and value for each filter. Click the trash can icon to remove a filter.
- Click Save to save the view.
When editing an existing view, you also have the option to save your changes as a new view or delete the view entirely.

Managing Views
Click the dropdown next to the view name to access all available views. Views are organized into two categories:
- My Views shows views you have created.
- Shared with Me shows views other users have shared with you.
To share a view:
- Select Share View.
- Click Add New Permission.
- Search for the user you want to share with and click Share.
Additional view management options:
- Use the Duplicate button to quickly copy an existing view.
- Use the New View button to create a view from scratch.
- Click the Star icon to save a view as your default. When the star is yellow, that view will load automatically each time you open the Action Manager.
Action Manager in Sales and Matrix Assessments
A simplified version of the Action Manager is embedded directly into both the Sales Assessment and the Matrix Assessment components. This version follows the same Suggested Actions and Actions structure described above, scoped specifically to that individual assessment record.
To open the embedded Action Manager, click the arrow icon within the assessment component.
Suggested Actions in the embedded Action Manager are driven by the assessment rules configured by your ARPEDIO Admin. They reflect the specific answers given in that assessment and update dynamically as the assessment is completed. Converting a Suggested Action to an Action creates a Salesforce Task linked directly to that assessment record, which also becomes visible in any parent record Action Manager configured to display it via Views.