ARPEDIO Org Chart User Guide
The ARPEDIO Org Chart lets you visualize and manage client organizational structures directly within Salesforce, using contacts created for an Account to populate the chart.
Note: Dragging and dropping contacts in the Org Chart does not update the Reports To field on the contact record.
Note: If you already use the Reports To field in Salesforce, all Org Charts will be auto-populated upon installation.
Adding Contacts to the Org Chart
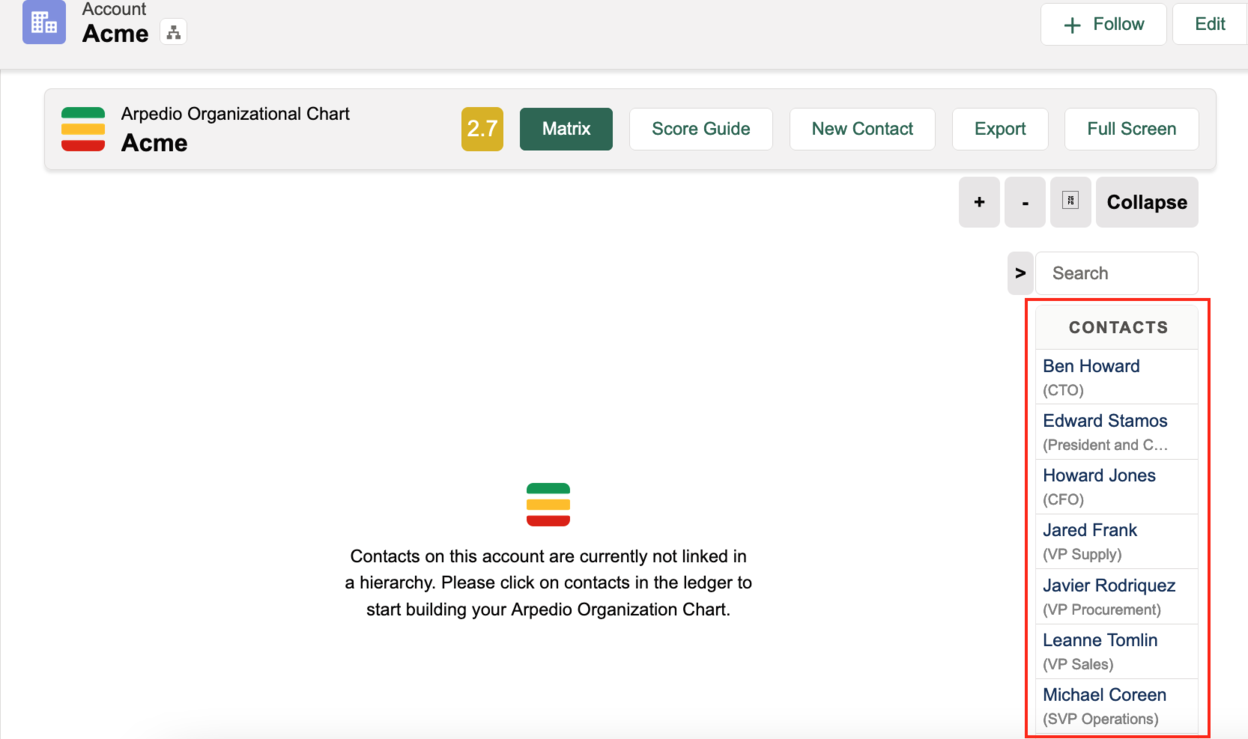
Contacts for the account are listed in the ledger on the right-hand side. Use the search bar to find a contact by name or title.
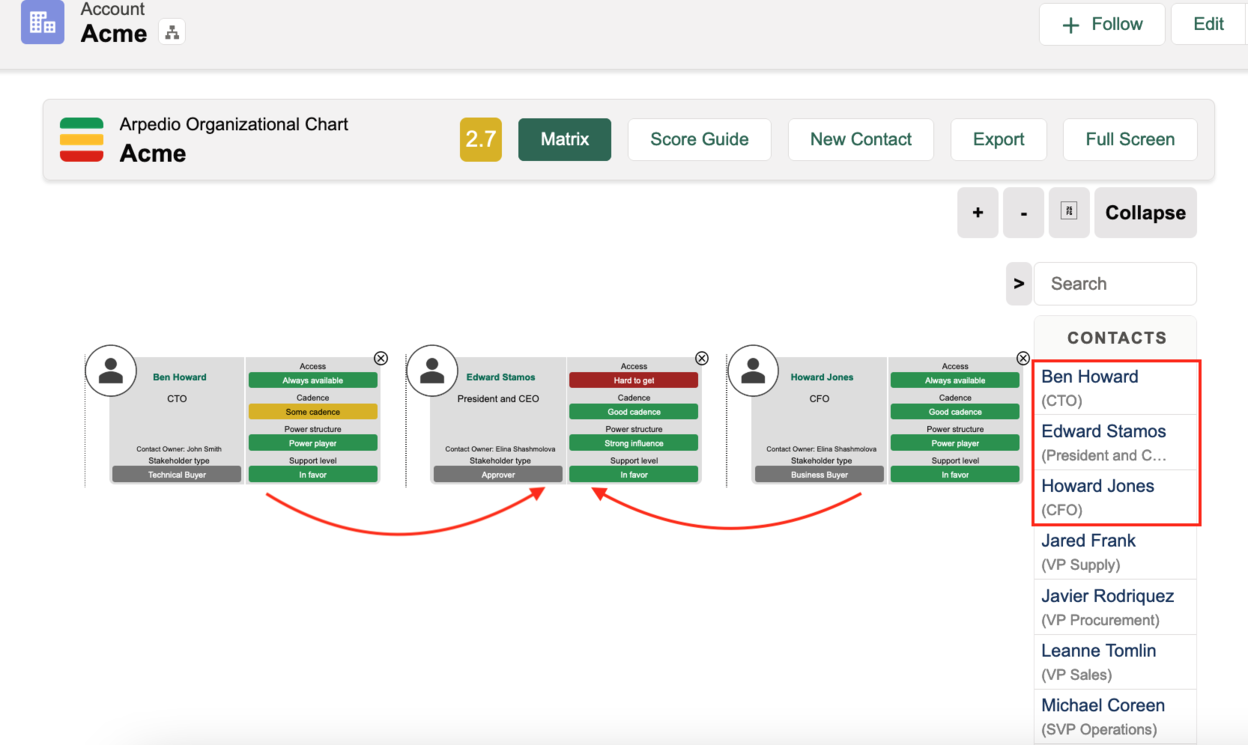
- Click one or more contacts to add them to the chart canvas.
- Drag a contact onto another contact to place it beneath that contact in the hierarchy.
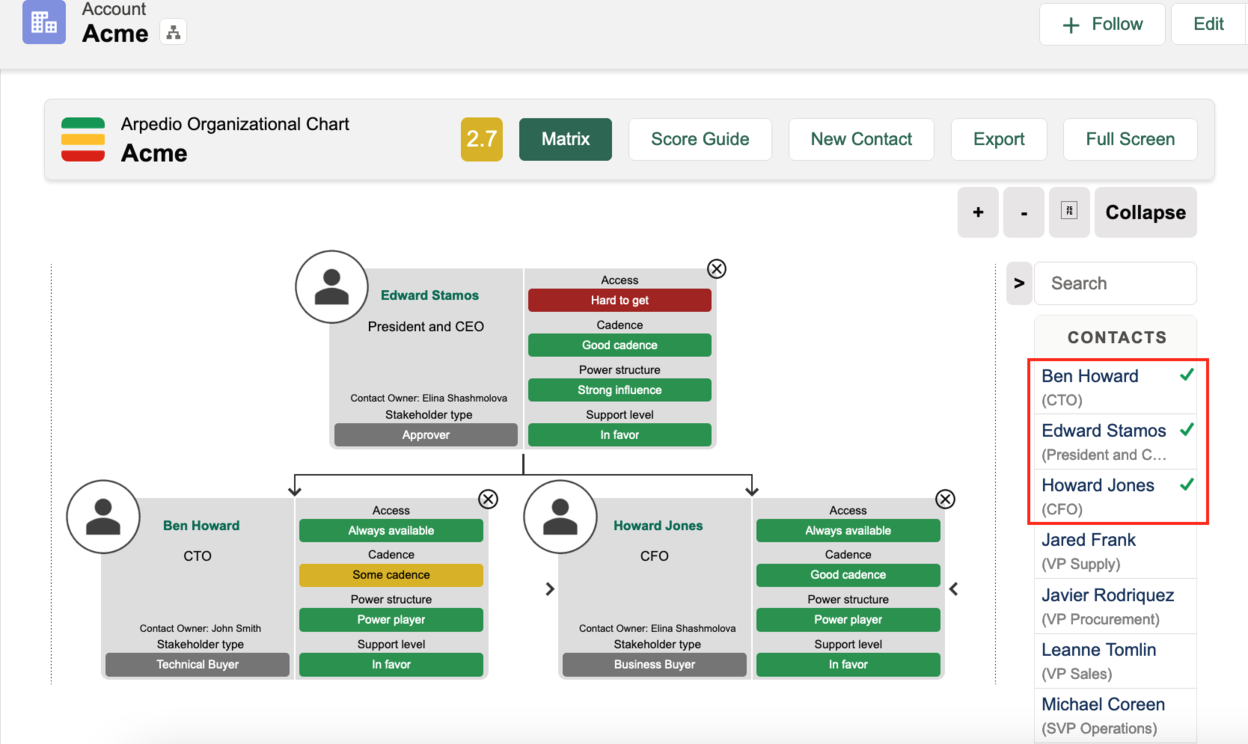
- Once a contact is part of the Org Chart, a green checkbox appears next to their name in the right-hand ledger.
To add contacts from other accounts, select All Contacts and search by contact name, account name, or other attributes. Contacts from external accounts are highlighted in both the chart and the ledger.
Navigating the Org Chart
- Click any contact in the chart or ledger to automatically zoom into that contact's position in the tree.
- Use the zoom in and out buttons, or scroll with your mouse.
- Hover over a contact to access the collapse arrows, which let you collapse the tree upwards, downwards, or to the sides.
- A wide grey clickable arrow indicates additional contacts are available to expand in that direction.
Working with Tabs
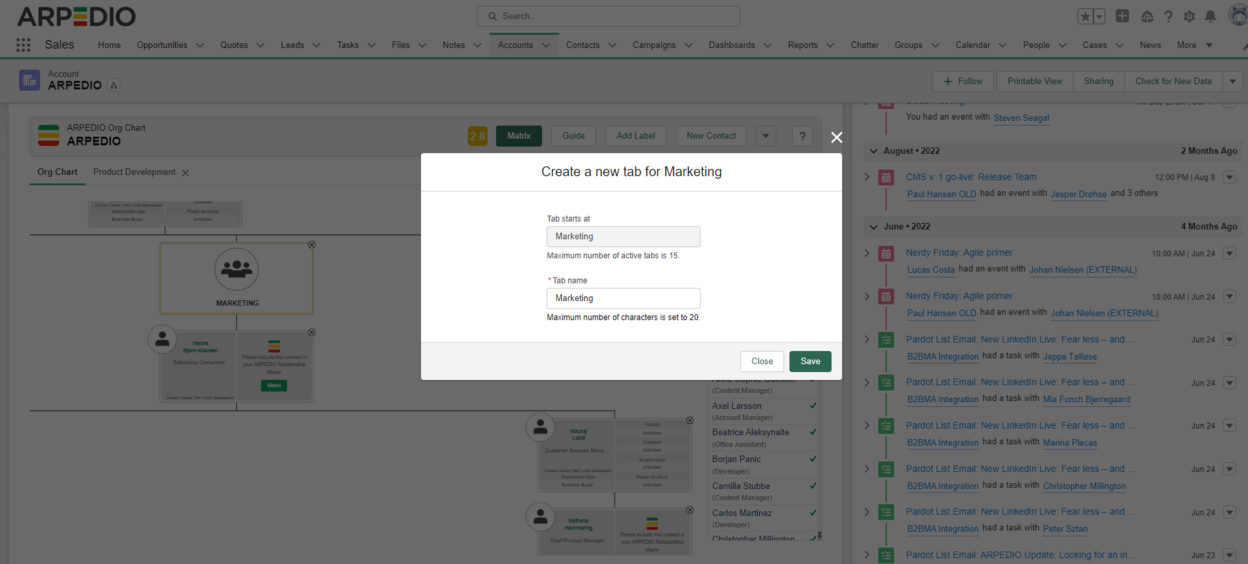
If the Org Chart becomes large, you can create tabs to focus on a specific section.
- Click the + icon on any contact card or label to create a tab.
- The selected card and all its subordinates will appear as a separate tab.
- All changes made in a tab sync automatically with the main Org Chart and vice versa.
You can create up to 15 tabs.
Tip: When working on a large Org Chart, open the relevant tab to isolate a specific branch before adding or moving contacts. Contacts added while in a tab view will appear directly within that branch, making precise placement significantly easier.
Removing or Replacing a Contact
To remove a contact, click the circular black X in the top right corner of the contact card. If the contact has no subordinates, it is removed immediately. If the contact has subordinates, you will be prompted to choose what to do with them before confirming.
To replace a contact without rebuilding the hierarchy beneath it:
- Click the X on the contact card you want to replace.
- In the menu that appears, select Switch this element for another Contact.
- Use the search bar to find the new contact you want to place in that position.
- Select the contact. The new contact will replace the old one while keeping the existing hierarchy intact.
Adding a Photo
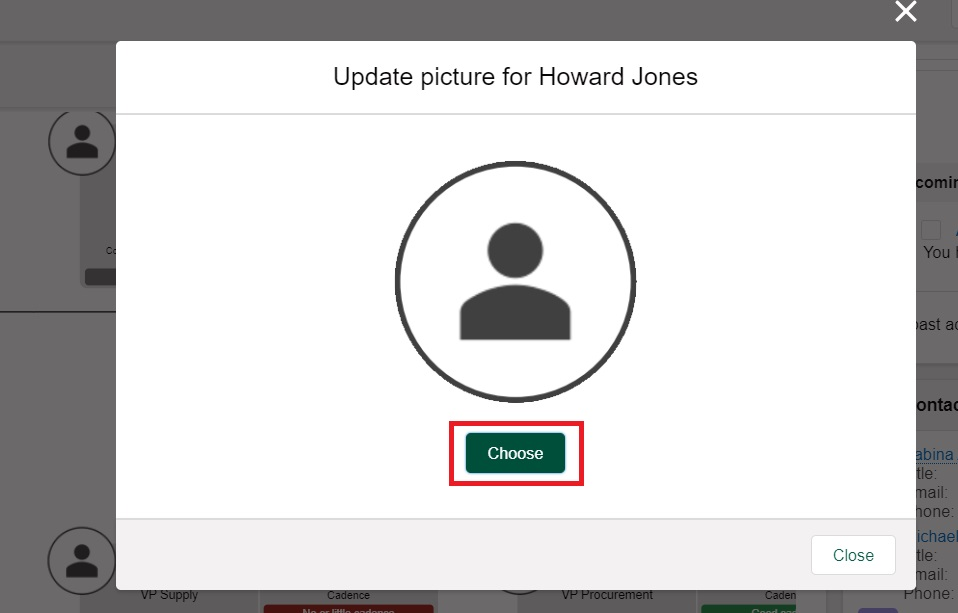
Click the circle silhouette icon on a contact card to attach a photo to that contact in the Org Chart.
Managing Influences
Influences allow you to visualize relationships between stakeholders that exist outside the standard reporting hierarchy. To access the influence options, click the circle icon on a contact card. You will be presented with three options:
Manage Influences lets you define which other stakeholders this contact influences.
- Click Manage Influences.
- Select the appropriate stakeholder from the list.
- Click Save.
View Influences creates a visual overlay showing all stakeholders that the selected contact influences. The contact you are focusing on is highlighted in blue. Click Provide to close the view.
View Influenced By shows all stakeholders who have an influence on the selected contact.
Filtering the Org Chart
Filters let you create focused views of the Org Chart based on specific Matrix attributes.
- Select Filter By from the dropdown.
- Choose the attribute you want to filter by.
- Click Apply.
The Org Chart will update to show only stakeholders who have that specific attribute assigned.
Exporting the Org Chart
Once your Org Chart is complete, click Export to generate a file. The export options are as follows.
Export Format
- PDF file
- PNG image file
Card View
- Detailed View displays the full contact card as seen in the Org Chart, with stakeholder details on the left and Matrix assessments on the right.
- Simple View removes the Matrix assessment section and displays stakeholder details only.
Fields to Include
Select which fields appear on each card in the export:
- Contact picture
- Name
- Title
- Contact owner
- Stakeholder type
Tabs
By default, the full Org Chart is included in the export. If you have created custom tabs, you can select individual tabs to export as separate PDF or PNG files.
Include Current State
You can also choose to include the active filter view or the active influence view in the export.
Note: To export a specific filter or influence view, you must be in that view before clicking Export.
Contact Card Information
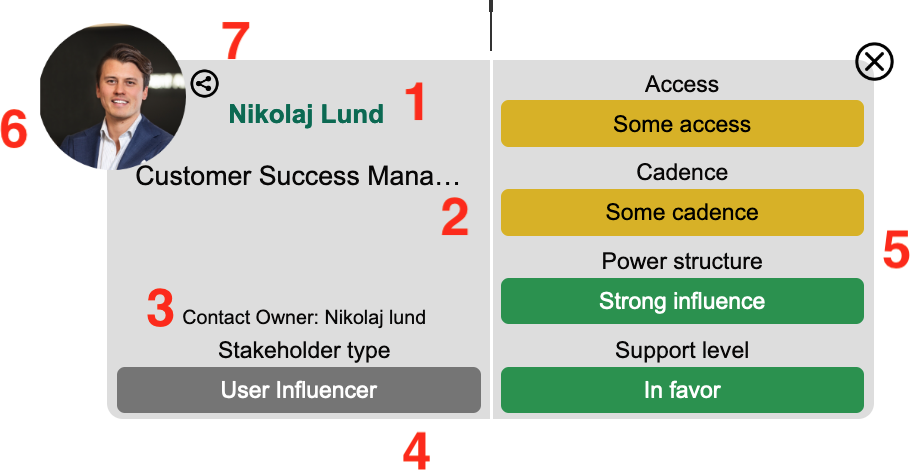
Each contact card displays the following:
- Contact name
- Contact title
- Contact owner
- Stakeholder type from the ARPEDIO Matrix
- The first four attributes from the ARPEDIO Matrix
- Contact photo
- Social media icon, visible only when the Org Chart is not in full screen, and the contact has a social media link on their contact record
Org Chart Toolbar
The toolbar provides the following options:
- ARPEDIO Matrix score
- Button to open the ARPEDIO Matrix
- Score guide, showing where to focus based on stakeholder types and support levels
- Option to create a new contact
- Option to export the Org Chart (supported in Google Chrome and Microsoft Edge only)
- Full screen mode toggle
- Zoom in and out buttons
- Adjust Org Chart button
- Toggle to collapse the ARPEDIO Matrix attributes on the right side of contact cards, for a simplified view without attributes.
- Hide ledger button
- Search bar